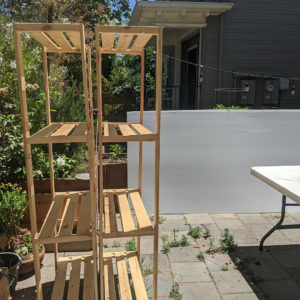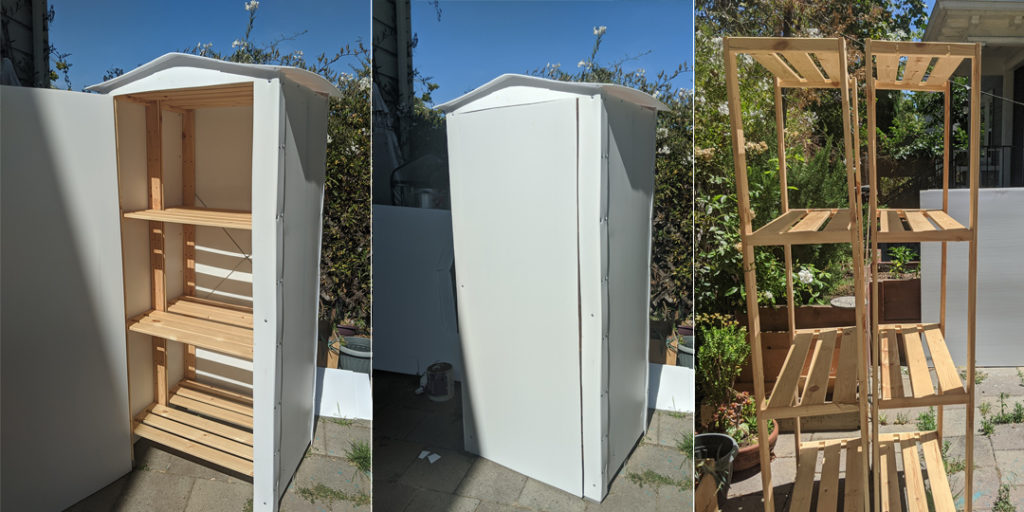
So last weekend with the help of my friend Liz, I turned some Ikea Hejne shelves into a little shed for outdoor storage. I got two sets of this shelving free off craigslist.com.
These were the steps and material to skinning the shelves to make the little shed. It was not intended to be airtight just water-resistant. Image gallery below.
These were the tools and supplies needed for this project.
- 2x Ikea Hejne Shelves
- 2-inch wood screws
- 3/4 inch, #8 Self-tapping Screws, Teks, Philips Truss Head
- Box Cutter (for cutting the coroplast)
- Sharpie
- Straight edge (I used a big level)
- Measuring Tape
- Drill/driver
- 3x, 8×4 sheets of coroplast
These were the build steps
- Assemble the shelves and screw them together in a few places with wood screws. To not use one of the X braces on one set. It can be double up on the back side.
- Use the wood screws to screw the shelves together in at least 4 places making a nice solid block
- Cut side panels out of the coroplast without any hanging edges using the box cutter. We used the shelves to cut the sides because they are not perfect rectangles… see cheap, free stuff. The side panel has no overhang on the edges. it can even be a tiny bit short as the front and back panels wrap around.
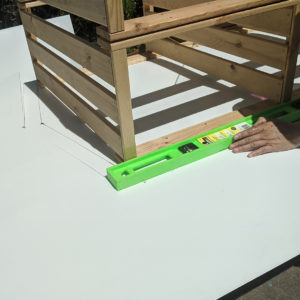
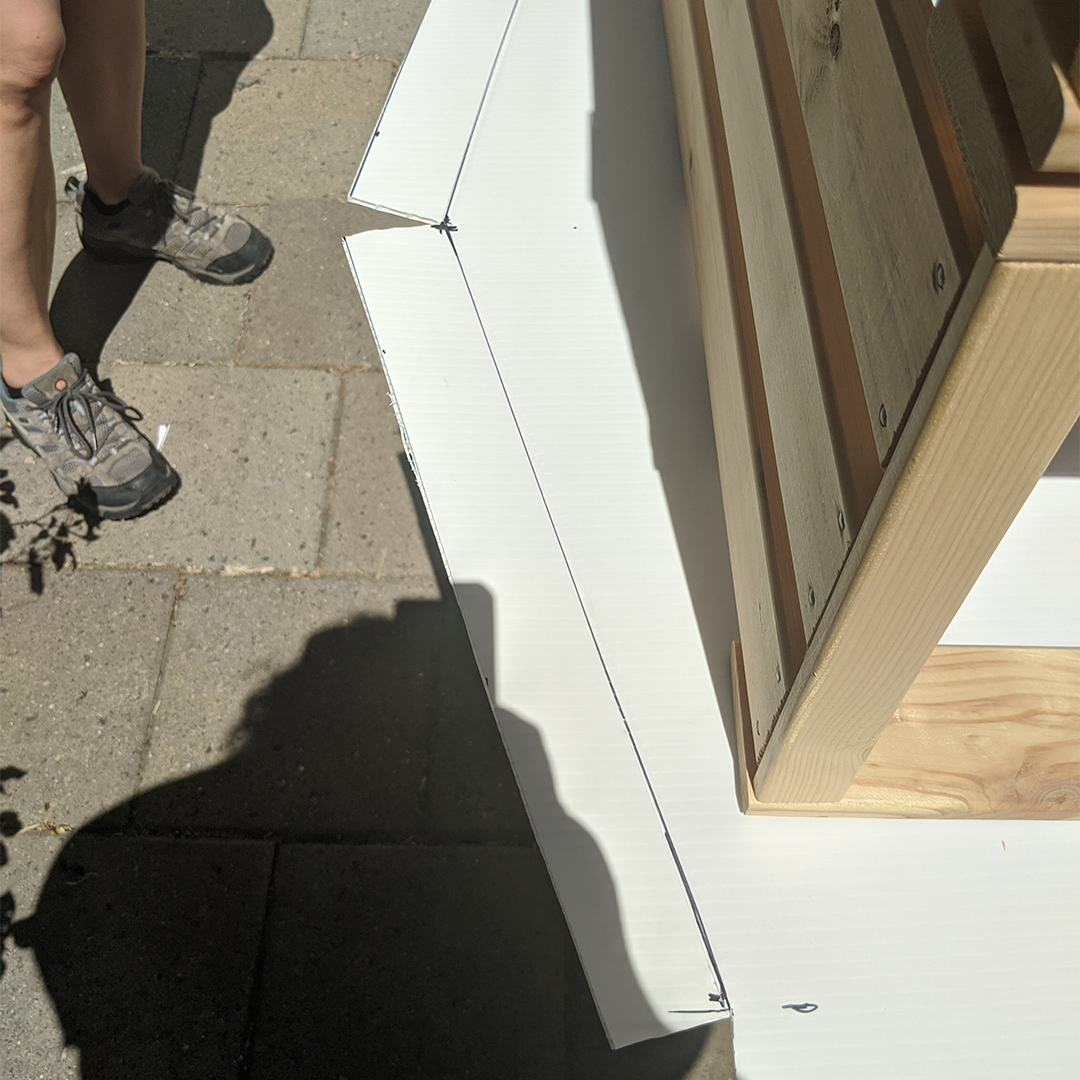
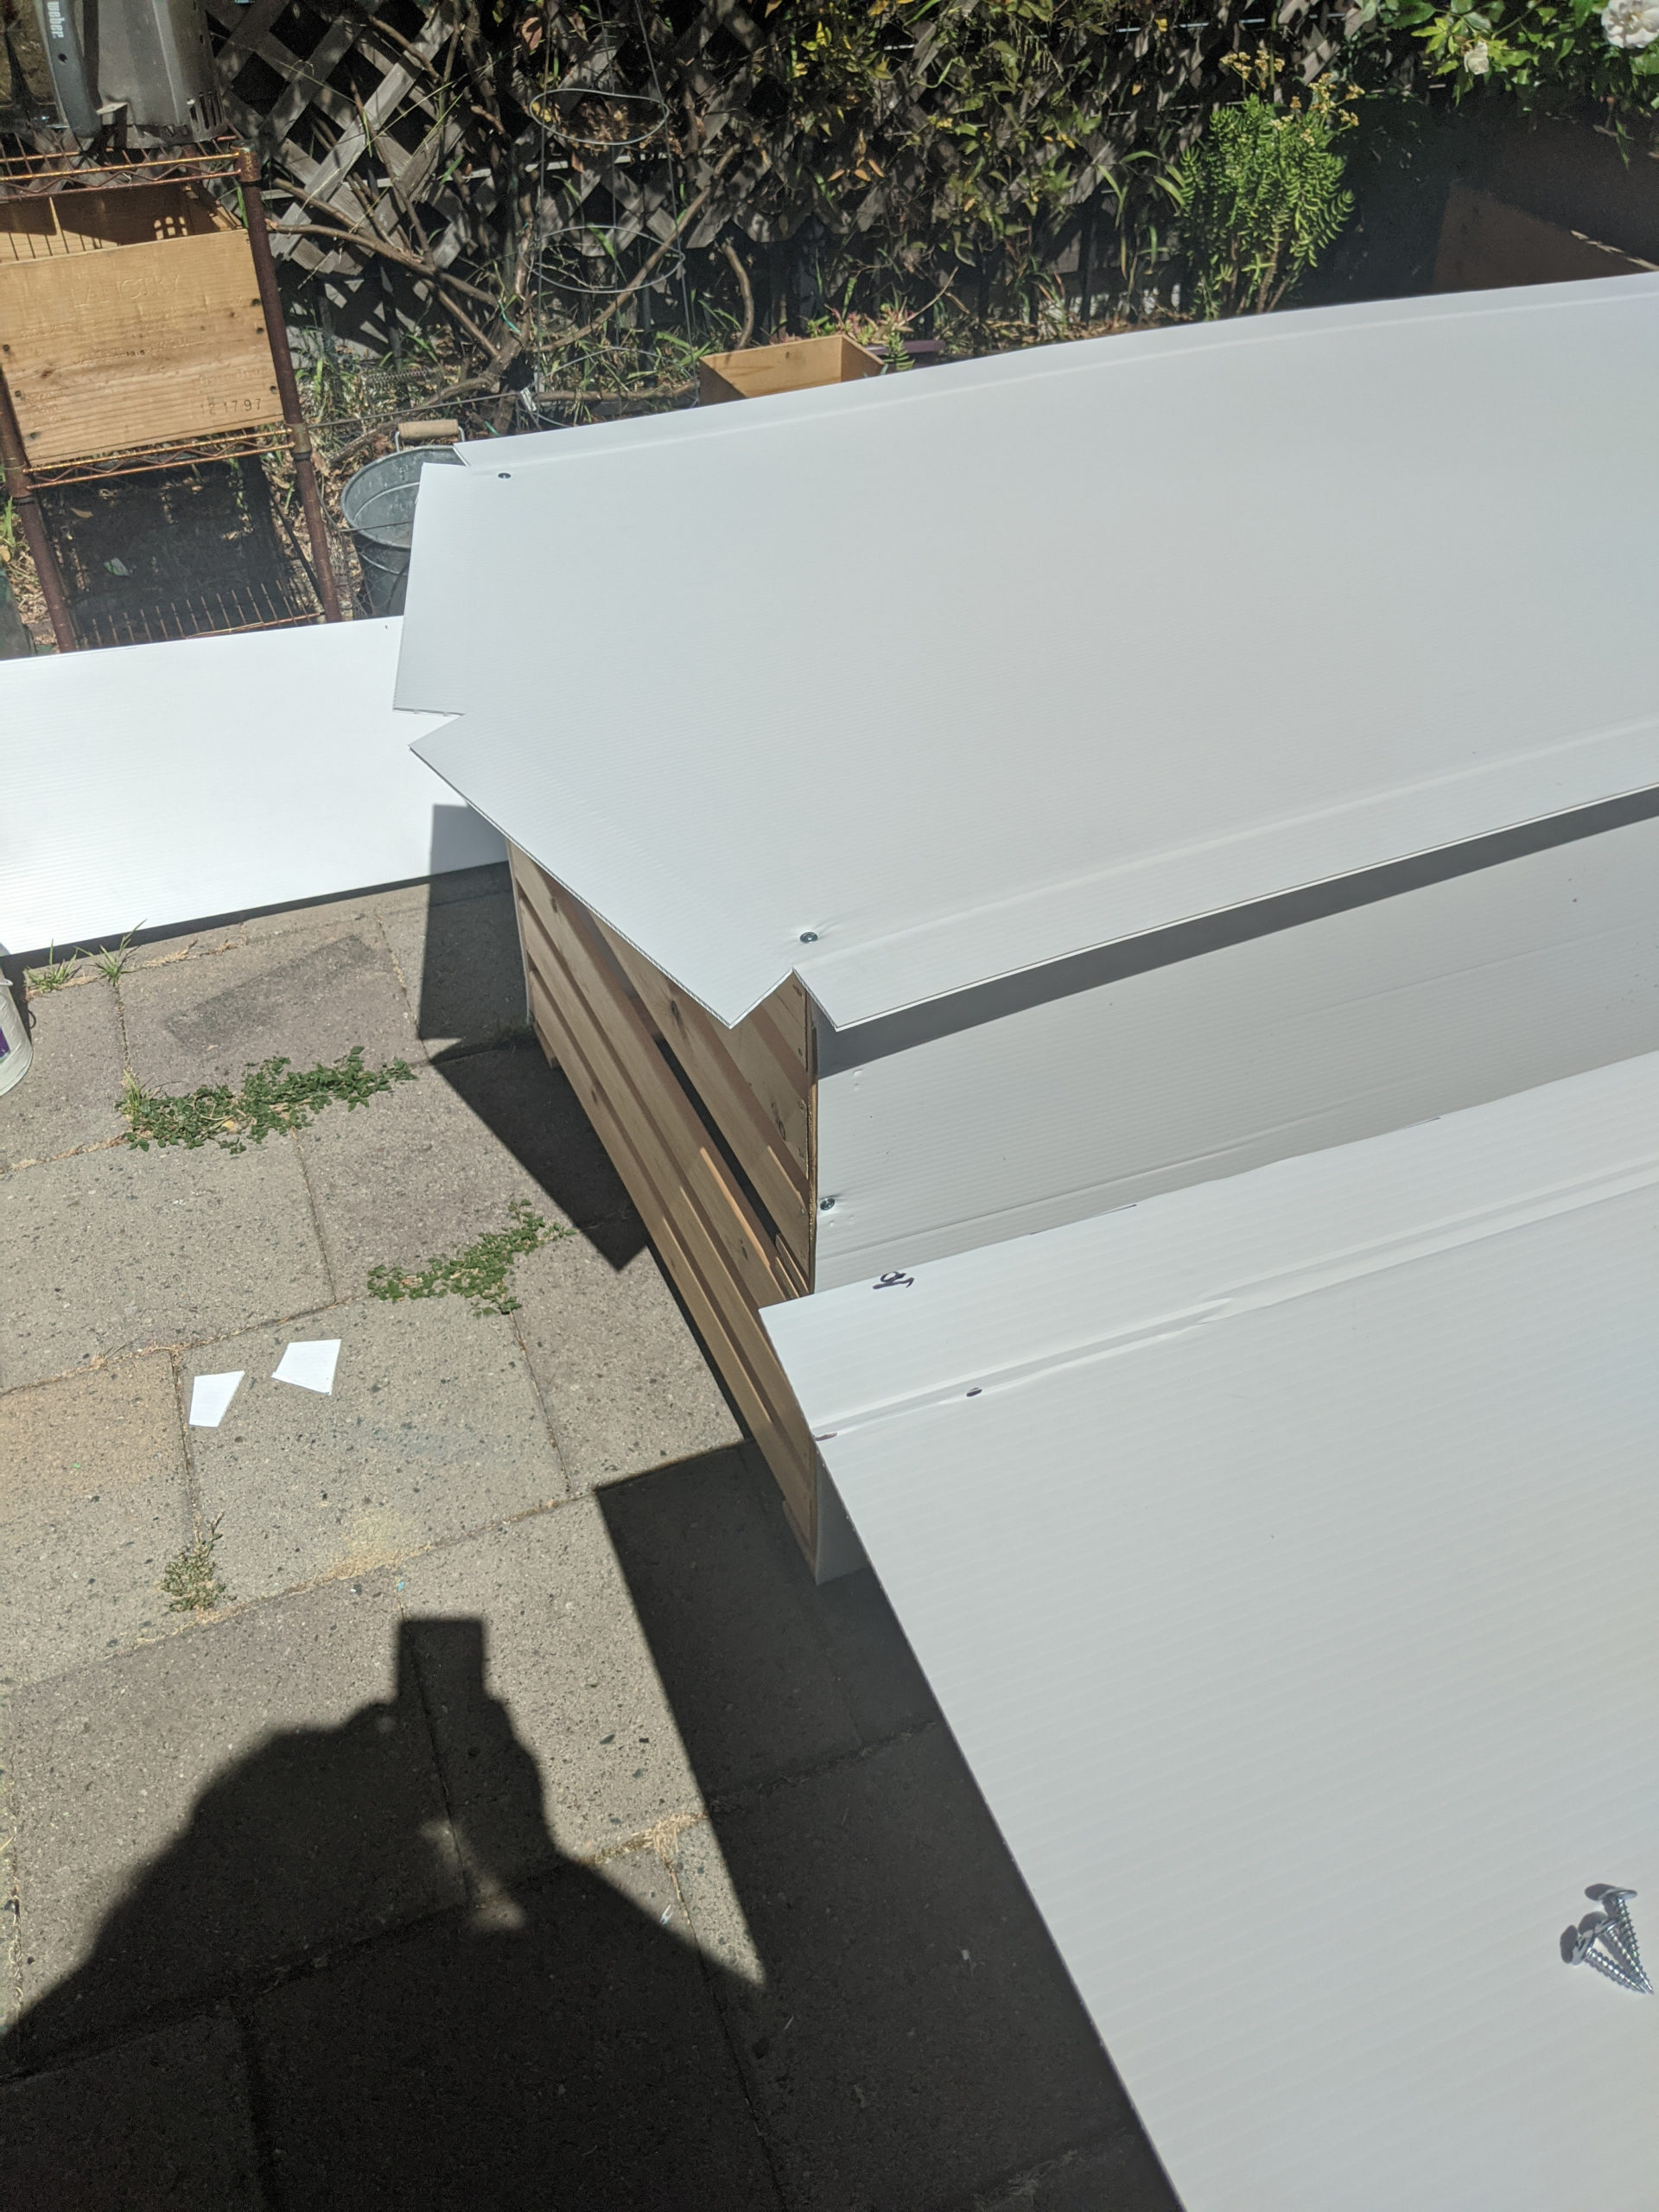
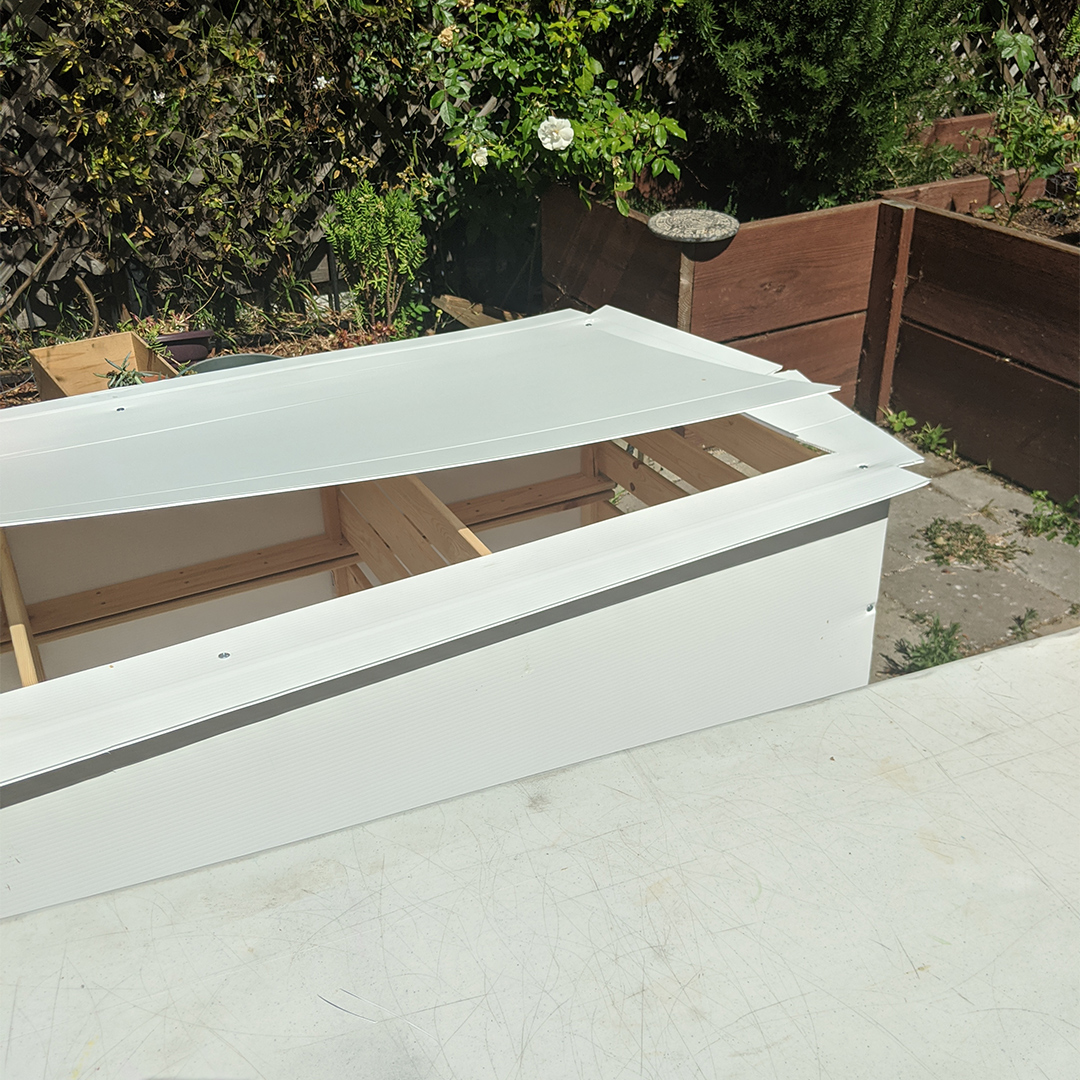
- Next mark out the front and back. I made the slight peaked shape in the middle to runoff water. We cut 2.5 inches on either side to wrap around the edges. Along the top edges, I cut an extra 1.5 inches that would fold i to support the roof attachment.
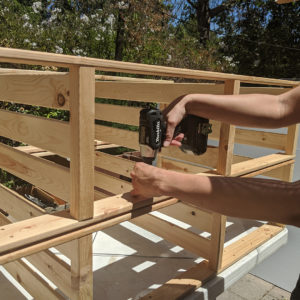
- Once all the sides are cut it is time to screw it together. Use the self-tapping screws to attach the side panels to the shelves. Don’t be shy about using a lot of screws but be careful about over-tightening.
- Line up the back panel with the side panels and fold over the 2.5-inch edge. This is easier if you pre-fold the side flap. Use the self-tapping screws to attach the coroplast to the face of the shelves in six spots around the edges. Then screw through both layers of coroplast on the wrap-around edges. You will not be hitting wood at this point so don’t over tighten.
- Repeat the previous steps on the front piece, then cut a door out using the edge of the shelves as your guide. Go slow with the knife.
- Next map out a roof that hangs over on all sides at least 1.5 inches. Cutt out of coroplast and pre-bend the center.
- Fold over the peak edges and secure the roof to the folded edge with self-tapping screws
- You can make a door catch with additional scrap coroplast and magnets (not shown, I couldn’t find my magnets!)
- Paint! Also not shown. Use Rustoleum plastic primer and then spray paint or latex to give the look you want. I will be using stencils to give it a decorative street look in turquoise and magenta. and lime green.