Author: craftyavenger

Overly Organized Gardening – Laser cut garden labels

I don’t usually grow a lot of things from seed and almost ever edibles but along with many pandemic gardeners, I am branching out. I made these little garden labels out of 1/8th in baltic birch plywood. I also make some pins to hold down the chicken wire I use in the garden to defend from squirrels and cats.

For those interested here is the Adobe Illustrator file with the editable art. I cut these on at 100w C02 infrared laster at Ace Makerspace, using 55speed and 45 power for the cut and 600speed and 35 power for the etching. The file took about 23 min. to make the whole batch, with a cost of $7 for the laser time and about 4 dollars for the plywood.


pastic white diy shed and shelves

Hacked Ikea into a Shed

So last weekend with the help of my friend Liz, I turned some Ikea Hejne shelves into a little shed for outdoor storage. I got two sets of this shelving free off craigslist.com.

These were the steps and material to skinning the shelves to make the little shed. It was not intended to be airtight just water-resistant. Image gallery below.

These were the tools and supplies needed for this project.

  • 2x Ikea Hejne Shelves
  • 2-inch wood screws
  • 3/4 inch, #8 Self-tapping Screws, Teks, Philips Truss Head
  • Box Cutter (for cutting the coroplast)
  • Sharpie
  • Straight edge (I used a big level)
  • Measuring Tape
  • Drill/driver
  • 3x, 8×4 sheets of coroplast

These were the build steps

  1. Assemble the shelves and screw them together in a few places with wood screws. To not use one of the X braces on one set. It can be double up on the back side.
  2. Use the wood screws to screw the shelves together in at least 4 places making a nice solid block
  3. Cut side panels out of the coroplast without any hanging edges using the box cutter. We used the shelves to cut the sides because they are not perfect rectangles… see cheap, free stuff. The side panel has no overhang on the edges. it can even be a tiny bit short as the front and back panels wrap around.
  4. Next mark out the front and back. I made the slight peaked shape in the middle to runoff water. We cut 2.5 inches on either side to wrap around the edges. Along the top edges, I cut an extra 1.5 inches that would fold i to support the roof attachment.
  5. Once all the sides are cut it is time to screw it together. Use the self-tapping screws to attach the side panels to the shelves. Don’t be shy about using a lot of screws but be careful about over-tightening.
  6. Line up the back panel with the side panels and fold over the 2.5-inch edge. This is easier if you pre-fold the side flap. Use the self-tapping screws to attach the coroplast to the face of the shelves in six spots around the edges. Then screw through both layers of coroplast on the wrap-around edges. You will not be hitting wood at this point so don’t over tighten.
  7. Repeat the previous steps on the front piece, then cut a door out using the edge of the shelves as your guide. Go slow with the knife.
  8. Next map out a roof that hangs over on all sides at least 1.5 inches. Cutt out of coroplast and pre-bend the center.
  9. Fold over the peak edges and secure the roof to the folded edge with self-tapping screws
  10. You can make a door catch with additional scrap coroplast and magnets (not shown, I couldn’t find my magnets!)
  11. Paint! Also not shown. Use Rustoleum plastic primer and then spray paint or latex to give the look you want. I will be using stencils to give it a decorative street look in turquoise and magenta. and lime green.
hejne shelves and coroplast in the garden
Shelves Assembled and coroplast ready for cutting
drill on shelves
Using wood screws to secure the shelves front to back
level and hands on corolplast with shelves
Marking out the side, front and back on the coroplast
roof shape cut from coroplast
Shows the roof peak and the structural flaps that get bent to support the roof.
coroplast shapes on shelves
you can see how the panels are secured with the self-tapping screws and how the wrap-around flaps work.
door cutout
Door cutout
close up of the shed roof
Close up of shed roof edges and sides
frayed fabric

Troubleshooting the Fray Issue

This post specifically addresses the Fray Issue that has come up when sewing the MasksNow Pleated Pocket Mask. Troubleshooting for this issue is going to vary based on fabric thickness.

The issues

The leading edge of the pocket in the original instructions is not hemmed at the pocket opening and this can cause issues of fray especially in washing thick fabrics.

Mask pocket, with light fraying
frayed mask pocket
Mask pocket with heavy fraying post washing


Options

Hem the double-folded edge at the beginning of the assembly between Step 1 and Step 2. This is what it would look like:


hemmed filter pocket edge

Hem the single-folded edge and nose wire pocket in one go at the beginning of the assembly between during Step 2. This is what it would look like:

example of sewing down both pockets at once
Sketch of fray solution
Sewing down both pockets with one line if stitches in the shape of a “C”


Hem the single-folded edge with a zigzag stitch at the end of Step 1. This is a good solution for thick fabric.

ZigZag over thick fabric edge.

Whipstitch the frayed edge. This is a good solution for masks that are already complete and that frayed in the wash. There are tons of hand sewing whipstitch edges tutorials on google. They will all work.

Glue… fabric. Depending on how bad the fraying is products like Fray-Check and other washable fabric glues can also be used. But I recommend this solution for the end-user only as you never know what folks are allergic to.

mask-t-shirt-ties

How to breakdown a t-shirt for mask ties

There are two ways to breakdown a t-shirt for mask ties, ties only or edge binding. This how-to post describes both.

For ties only

This method maximizes the shirt for strong ties that are 18 to 20 inches long when moderately stretched. This makes for a strong comfortable tie and a good mask fit.

Lay the t-shirt out flat
Remove the sleeves and neck banding.
Remove the hem
Remove the shoulder seams
Remove side seams if sewn
Fold in half and use a rotary cutter and quilters ruler to being cutting your stipes length-wise from shoulder to hem. DO NOT cut acrossthe knit. Cut strips 1.5 inches wide.
Cut strips 1.5 inches wide.
Discard any odd or non-continuous bits.
Stretch out to make soft round ties. Sew together if you needed. And cut to length for your mask.
Keep in mind that the flat length and the stretched length will vary. Keep that in mind when cutting for ties. Ties for an adult head from the corner of the mask to the end of 1 tie is approximately 18 to 20 inches usually.

For edge binding

This method results in ties that can be easily double folded to make edge binding and ties. For this method, you need to cut the strips wider so they are strong when stretched. If cut to thin with this method the ties will not hold the mask in a secure fit for long wear.

  1. Lay the t-shirt out as flat as possible
  2. Using a rotary cutter or very sharp scissors remove the sleeves and collar area from the body of the shirt.
  3. Remove the hem of the shirt
  4. Discard any narrow bits left over.
  5. Cut horizontally across the body of the shirt at 1.75″ to 2″ lengths. This is easiest with a rotary cutter and a quilters ruler.
  6. Discard any narrow bits left over.
  7. Double fold and use as edge-binding. Stretch the strips to create round soft ties after sewing as binding. If you have odd short bits you need to combine to create strips be sure to sew them with a half-inch seam allowance and a zigzag stitch securely.
blue shirt
Step 1: Lay the t-shirt out as flat as possible
Step 2: Using a rotary cutter or very sharp scissors remove the sleeves and collar area from the body of the shirt.
Step 3: Remove the hem of the shirt
Step 4: Cut horizontally across the body of the shirt at 1.75″ to 2″ lengths. This is easiest with a rotary cutter and a quilters ruler.
Step 5: Discard any narrow bits left over.
Step 6: Stretch the strips to create round soft ties. If you have odd short bits you need to combine to create strips be sure to sew them with a half inch seam allowance and a zigzag stitch securely.


Mask and PPE Patterns

UPDATE!!! The content below is now out of date and has been replaced with the Bay Area Mask Making and Distribution Project


This is the place I will be posting patterns for personal protective equipment including Masks, Gowns, Booties and so on.

Disclaimer: These masks do not replace N95 masks. But are better than nothing and when made and worn correctly can get 65% – 85% of the particulate. This effort is to provide the most vulnerable in our population an option as shortages mean then have no other. This will free up proper PPE for Healthcare workers… because without them nothing else will matter. More from the CDC

Last Updated: March 20, 2020 – Links unvested… sewing begins tomorrow.

Masks

  • Shaped – https://freesewing.org/blog/facemask-frenzy/
  • Shaped – https://www.instructables.com/id/DIY-Cloth-Face-Mask/
  • Basic – https://buttoncounter.com/2018/01/14/facemask-a-picture-tutorial/
  • This one might be better for personal use as the wire fabrication is a bit intense. – khttps://drive.google.com/file/d/1t9cEstgEH3G_9meAd7TZF9-UQdrt8gbc/view?fbclid=IwAR33wG9P9BgrjroDye20xpv5LbEjkjT2BScs9R4EDKj9MV0K74GkGOU1uc8

We are thinking of going with 3 types, all sewing out of cotton and using elastic or cotton straps

  1. Basic 2 layer surgical mask, head straps not ear straps, no pocket
  2. Shaped Mask with a pocket for disposable filter material, head straps – a modified version of this design
  3. N95 Covers for healthcare workers – Based on this design

As of 3-21-20 we are looking for contacts at local healthcare institutions to help us validate the best kind to make.

Gowns

Booties

Mask Making and Distribution

UPDATE!!! The content below is now out of date and has been replaced with the Bay Area Mask Making and Distribution Project


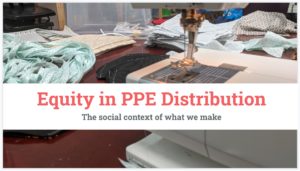
Goal: Make PPE to FREE up the dwindling supply of N95 Masks for Front Line Healthcare Workers

This started with the idea to just do something to help.

3-20-20

I have gotten the okay from Stone Mountain and Daughters to purchase cotton at $5 per yard for making masks.(No Contact Purchase)

Unfortunately, I am broke AF as most of my income is drying up in these trying times. But I have time and skills. So makin’ masks is what is going on.

I am asking for ya’lls help to:
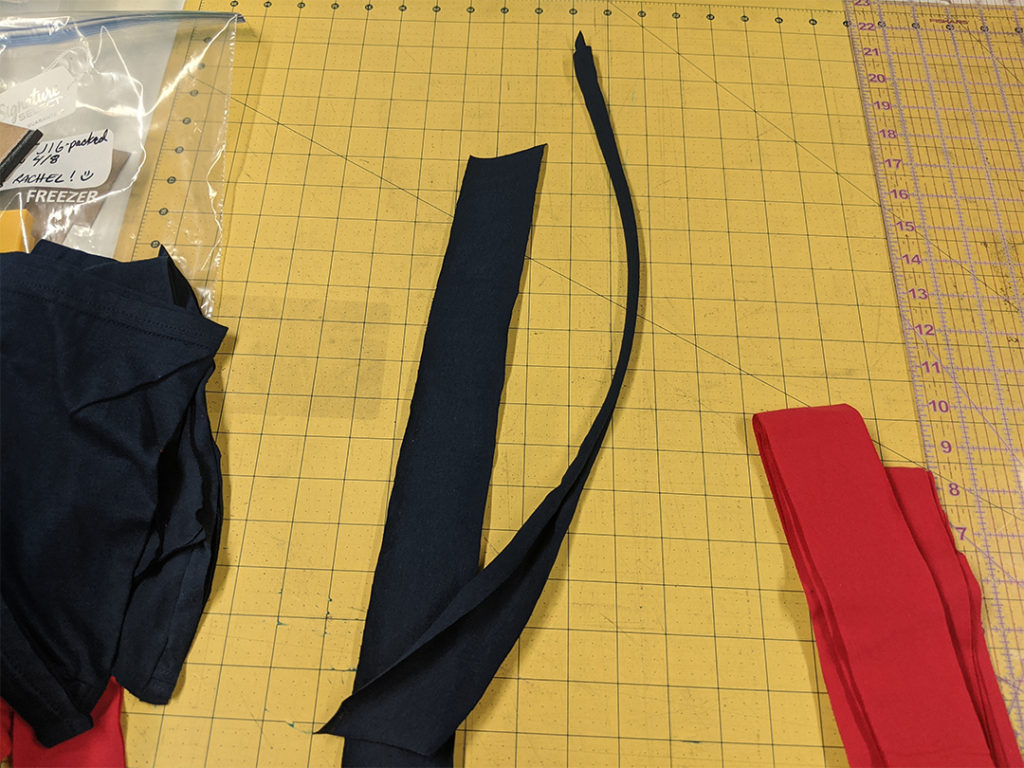
  1. 1) Buy Mask Fabric
  2. 2) Sew Masks (if you are the sewing type) once the fabric is acquired.
  3. 3) Collect information on the right place to donate them (aka facilities that can launder them to ensure they are safe before use)

We can do this all no contact and provide them to healthcare facilities to launder to standards and use as they see fit. While this may not directly fix the mask shortage as sewn masks are not as good as N95’s they will help in places like cancer wards, elder care facilities, blood collection labs and so on.

Please paypal paypal.me/craftyavenger

$5 = materials for approx. 12 masks

Update!

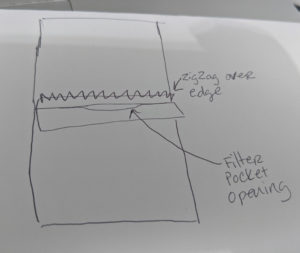
For folks wanting to join in the mask making Additional resources are being collected and will roll out today and tomorrow including patterns and standards. For the near term here are a few guidelines:

  • Anybody who is feeling sick in any way, even if it just might be hay fever, please do not engaging in mask making. There are other ways to help.
  • Anybody with suggestions on Bay Area organizations to contact for distribution please comment or email [email protected]
  • Elastic is in short supply. If you have .25″ elastic sources please email about those too.

Disclaimer: These masks do not replace N95 masks. But are better than nothing and when made and worn correctly can get 65% – 85% of the particulate. This effort is to provide the most vulnerable in our population an option as shortages mean then have no other. This will free up proper PPE for Healthcare workers… because without them nothing else will matter. More from the CDC

Hugs. Stay Safe Out there.

Bay Area Distribution of DIY PPE Gear

UPDATE!!! The content below is now out of date and has been replaced with the Bay Area Mask Making and Distribution Project


We are working on getting a list of places with addresses and contact information. The recommendation from some of the frontline healthcare workers I know are as follows.

Before drop off please consider the source. Many carriers are asymptomatic. You can have it and not know it and be doing more harm than good. 

Best: Places with proper healthcare laundering facilities!

Good: If it is not possible to deliver to a location with proper laundry facilities please place clean gear in a dated plastic bag, date the bag and drop of at locations with the recommendation to wait 14 days from the date on the bag to use the gear OR sanitize before use.

The best places for these DIY supplies are the front line locations for the pandemic including:

  • Skill Nursing Facilities
  • Any homeless shelters
  • Any people serving the homeless
  • Assisted Living Home
  • Dialysis and Blood Labs

Building and delivering The Gift-o-Matic

So the big project I had been working on before the fire was the Gift-o-Matic. A 900 square-foot interactive area in the Oakland Museum of California. This work was commissioned by OMCA as part of the No Spectators: The Art of Burningman exhibition.

This was build in total burning man style by an amazing crew and community support. Special thanks go out to my OMCA partners Penny Jennings, Rene Levesque, and Peggy Monahan. OMCA was just great to work with.

The attendance for the exhibit was over 120k and the rough estimates were over 80k interactions with the Gift-o-Matic. Both numbers well over expectations.

Below is the image gallery of the project from sketch right to the very last day.

sketch of Gift-o-Matic with woman for scale.
This sketch shows the relative scale intended for the Gift-o-Matic
Concept sketch for Gift-o-Matic
Concept sketch for gGift-o-Matic gift intake and vetting
Concept sketch for gift containers
Concept Sketch for “Moop” gift container baskets
Dr. Shiny and Clm working on the Base of the machine
Glitter epoxy tests.. results. More glitter
Colm testing the handle and axel movement
Base with cardboard mock-ups of face
Cardboard prototypes of the gift horn
Ben painting signage and panels
Bob adding the first layer of color to Moop basket stands
The louge sign being built
lasercut header signage mid fabrication
Dr. Shiny peeking through the front panel
working on environmental art for the Give Yourself the Gift of Chill Lounge
The very first build in the studio of the complete Gift-o-Matic
Dr Shiny working on the shoot that delivers gifts
Jesse M. after the first electronics installation
Moop basket stand letters in progress… laser cut wood
Moop basket stand faces
Dr. Shiny, Crafty and Liz on install day.
The artist plaque in the Oakland Museum of Californa
The Gift-o-Matic gift making area
Liz on opening night filling the hopper.
Close up of the finished signage… it orbs rainbows.
Awesome community volunteers making gifts in the studio
Gift pendants after gift making open studio. I love bees.
Gifts! In the 4 inch gift balls
Calavera gift pendant
Create hear signage in the gift making area showing the custom table wells
View of the Gift-o-Matic area from the lounge
Pendants on the laser bed
Mini-Masterpieces… on of many interactive gift making projects
Just an average weekend at the Gift-o-Matic in the No Spectator exhibit
what is a gift?
Jackalope pendant
Amazing Art by Liz Patrician donated to the Gift-o-Matic
Front view the the Take One Signage
More laser cut pendants… traditional chinese flower for lunar new year.
View of the Gift-o-Matic area from the main gallery
Renee G. with her amazing dino jewelry. An interactive Gift-o-Matic project.
Gift making stations
Hand dyed laser cut leather patches… an interactive project done at Gift-o-Matic
Hand dyed laser cut oak pendants… an interactive project done at Gift-o-Matic
Dino jewelry. An interactive Gift-o-Matic project.

Object Impermanence: When My Whole Studio Burned Down

It is with a heavy heart that I must report I lost my beloved studio and all its content on the Morning of August 9th in an early morning blaze that in one of the M0XY buildings. I am eternally grateful that nobody was hurt and everybody is safe.

I am heartbroken about the loss of work… about 20 years worth, but even more so for my studio mates and neighbors.

I was able to secure space for the build of the Gift-o-Matic in North Oakland (gift-oakland.com) build in North Oakland. This is mostly in thanks to folks who donated to my GoFundMe Campaign. Without them, I seriously don’t know what I would have done.


You can read about the fire in the news here:

https://www.kqed.org/arts/13864120/m0xy-warehouse-artists-in-oakland-plot-recovery-from-fire

https://abc7news.com/5455265/


The Flu is No Joke

Sorry about the long hiatus folks.

The flu was pretty devastating this year…coma, month stay in the hospital, walking, pneumonia and ARDS. I have been recovering for the last 6 weeks and I am just now getting to the point I can sketch (roughly) and start making things.

That said this spring as summer is filled with exciting projects!

More to come.